Welcome to Crafty Friday!
I have this wall in my entryway that someday, in my spare time, I plan on putting family photos up on. But for now it is blank and empty.
At Christmas time I hung a red ribbon with command strips and hung my Christmas cards there. So, then I decided for the different holidays and seasons I would hang banners from it.
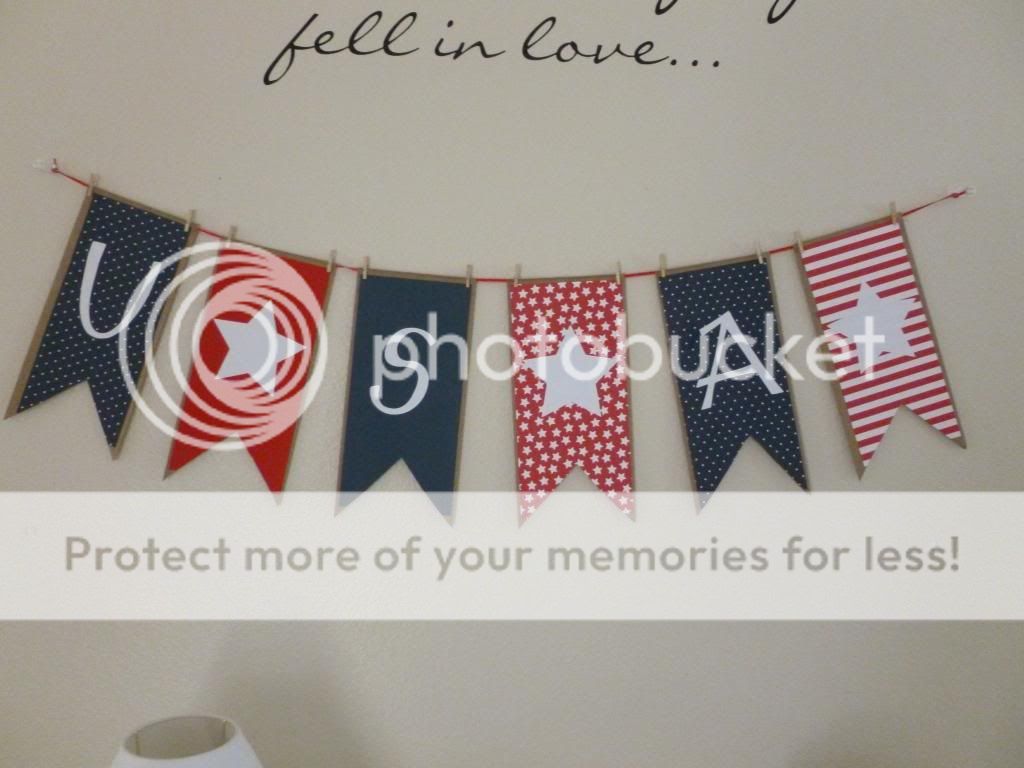
Today I am going to show you how I made one for the 4th of July.
Materials Needed:
6 paper lunch sacks Mini Clothespins
Coordinating scrapbook paper Ruler
Paper Trimmer Scissors
Double Stick Tape
First, I measured the paper bags and trimmed my base scrapbook papers to between an 1/8 " and 1/4" shorter than the paper bags on all edges. Then, I adhered the trimmed scrapbook paper to the paper lunch bags with double stick tape.
Next, I eyeballed where I wanted to make a V shape at the bottom of the paper lunch bag through both the bag and paper and made my cuts. You could measure it and then cut it, but I was being lazy.
Next, I used my Silhouette to cut the letters U, S and A and some stars out of white scrapbook paper. You could also use a stencil or free hand it. Then, with the double stick tape I adhered them to the bags.
Finally, I took mini clothespins and hung them on the ribbon.
Festive, quick, and easy!
Thanks for joining me today and check back for more of my 4th of July decorations!
Welcome to Water Wednesday!
Thanks for coming back for another Water Wednesday! Today we did an easy and fun word game with water balloons. All you need are two things - water balloons and chalk.
If your kids are impatient like mine is you will want to make your water balloons ahead of time. We bought a water balloon pump from a local store that came with water balloons. It worked, but was slow going and gave my arm a workout. After filling the water balloons we went outside and with the chalk I wrote sight words on the driveway. You could also put the names of colors, letter, numbers, shapes, or whatever words you would like your child to work on.
And of course we had to add a few names of heroes and villains from Batman. Have your child take a water balloon and as you call out a word, have them toss the balloon at the word. A word of advice, if your driveway slopes have them stand at the end of the driveway and toss the balloons up or else you will be chasing them down the driveway like I did. For every sight word my little guy got correct I then called out a name from Batman and let him throw a balloon at that name.
This was our first time throwing water balloons and once he got the hang of how hard to throw them to make them break he had a great time - and I snuck in some learning at the same time!
Welcome to Recipe Monday!
The recipe I have for you today is one my Great Grandmother used to make. I remember going to visit her in the summer on Cape Cod and she would have these yummy breakfast treats for us that she called hermits. And if we were really good we got to have them as snacks too!
Ingredients:
1 cup sugar 1/2 tsp. nutmeg
1/2 cup vegetable oil 1/2 tsp. cinnamon
3 cups flour 1/2 cup milk
1 tsp. baking soda 1/2 cup molasses
1/2 tsp. salt 1 cup raisins
Preheat your oven to 375 degrees .
First, mix together the sugar and the oil in a bowl and set aside. Then, sift together ALL the dry ingredients into another bowl.
In another bowl mix together the molasses and the milk ( I use 2% milk and they come out the same as with whole milk) After mixing the molasses and milk together slowly add it to the sugar and oil mixture stirring well. Then blend this mixture together with the dry ingredients until well mixed. Gently fold in the raisins.
Next, spread the mixture into a cookie sheet. I used my largest cookie sheet - it is about 17 x 11. And I did not grease it.
Put into the preheated oven and bake for about 15 minutes. You want them to be a golden brown and when a toothpick is stuck into the center no raw dough or crumbs should come back out on the toothpick.
Let the hermits cool completely before cutting into squares. I cut them right in the cookie sheet. Store the hermits in an airtight container for about a week. And I usually put wax paper in between the layers of the hermits so they don't stick together. If you like, they can be frozen for about 2 months.
Hermits make a great breakfast treat and my husband says they taste great with a cup of coffee!
Enjoy!