We are getting ready for back to school in a few weeks so my little guy and I were sorting through our school supplies to see what we had. And what we had was a big mess of open pen packages! I was trying to think of what to put them all in when I remembered I had a stash of Crystal Light Plastic containers in the garage. (I never throw stuff out)
First, I took four of the containers and just slid the plastic wrapper off of them.
Then I had my little guy sort them by color. The pens fit inside perfectly and the lids went back on. I was going to label them but since they are clear I just lined them up inside the desk drawer and we were done. And even better, we realized we don't need to buy any pens this year!
I love seafood and could eat it everyday! Here is an easy recipe for shrimp - just a warning - it is not low calorie!
Ingredients Needed:
1 lb. deveined and cleaned shrimp
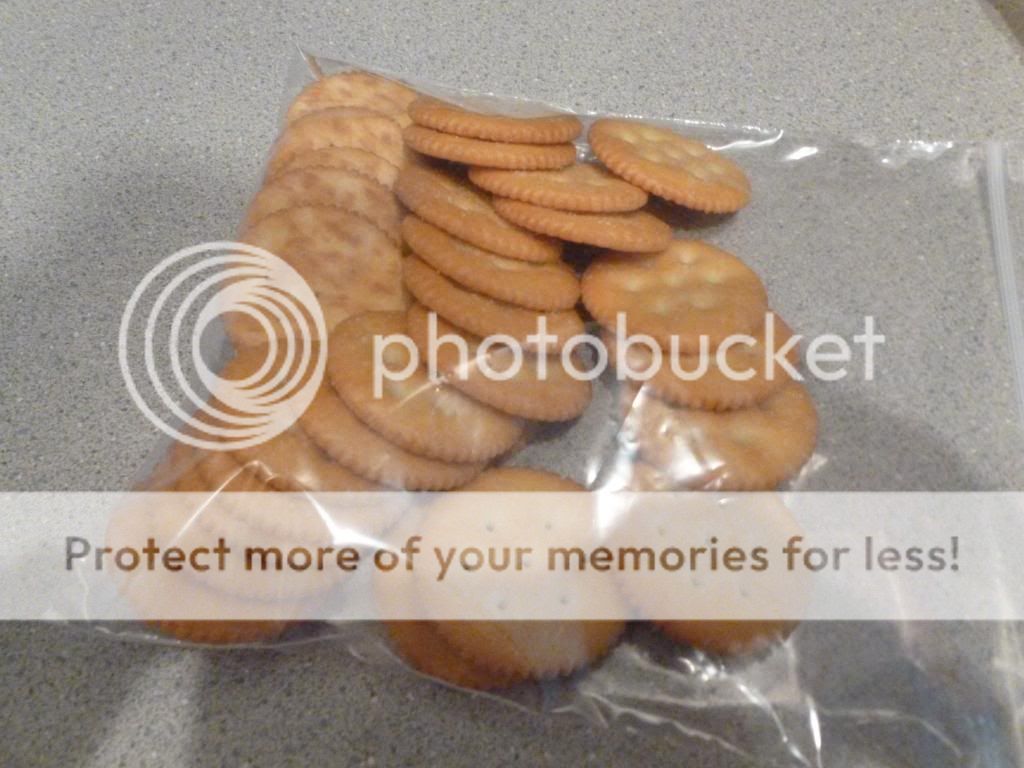
1 1/2 sleeves Ritz Crackers
1 stick of butter or margarine
Garlic Powder
Optional: Walnuts
White Wine
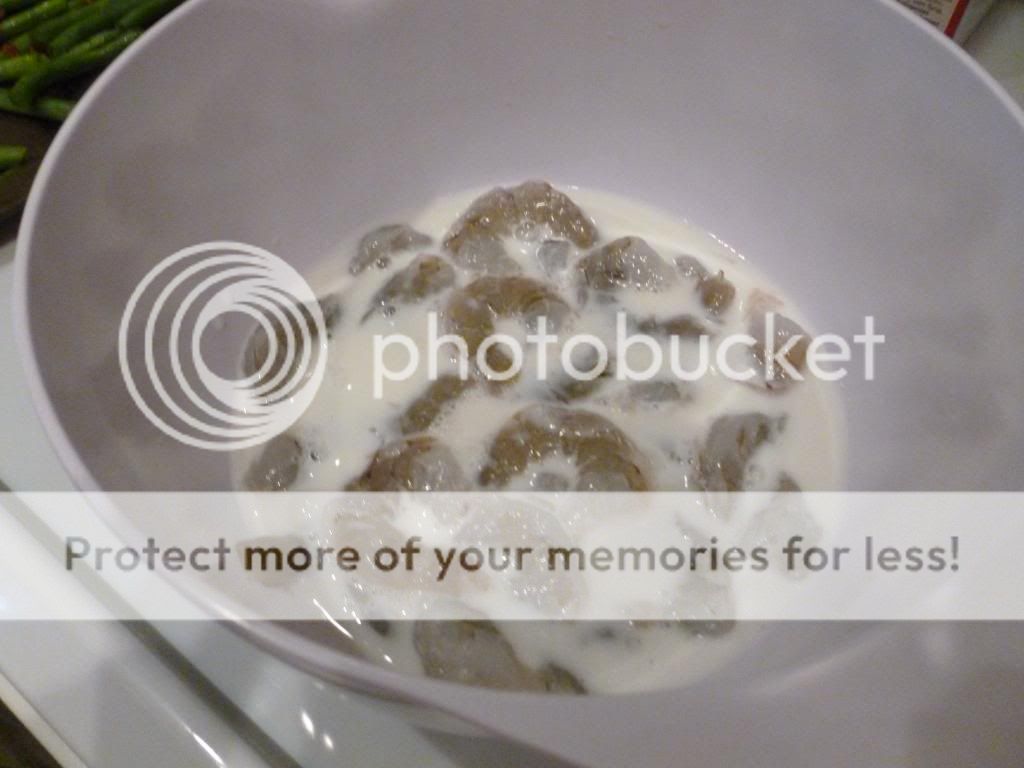
First, peel the shrimp and take off the tails. I always buy deveined shrimp to make it easier and quicker.
Then I prefer to soak my shrimp in a bowl of milk for about a half hour. I do this to take some of the "fishy" smell and taste away.
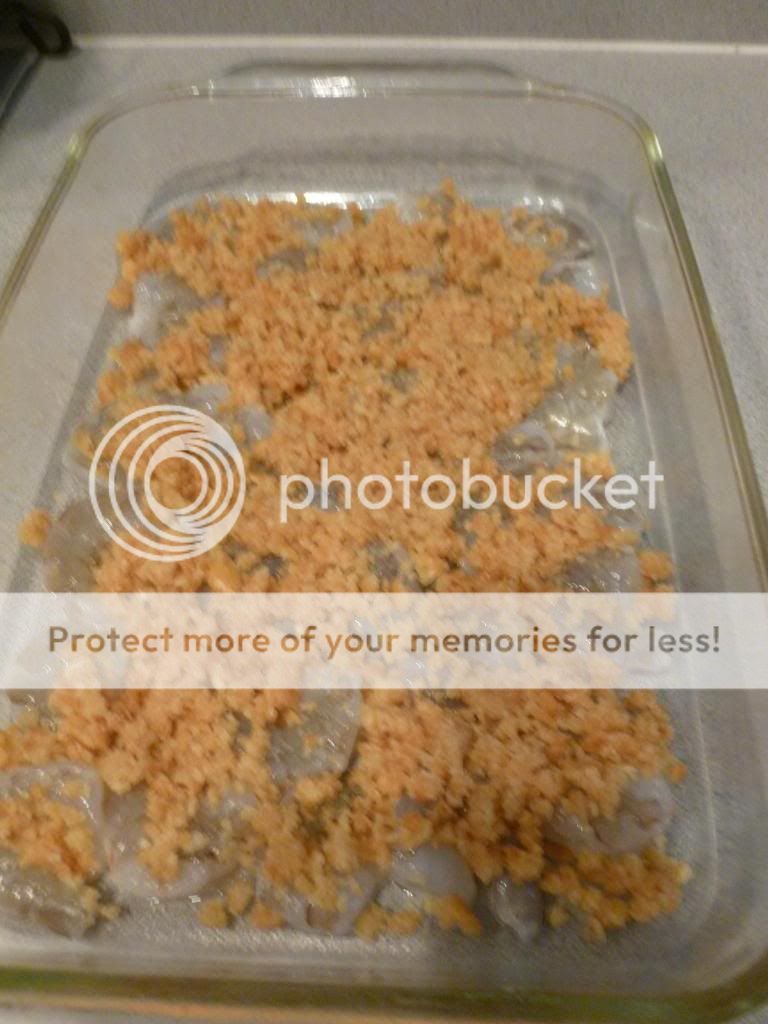
Preheat your oven to 350 degrees. Then drain, rinse, and pat dry the shrimp. Next, take the shrimp and lay in a single layer in a greased 13 x 9 x 2 pan. Put the Ritz crackers in a plastic sandwich bag and crush into crumbs, or you could use a food processor.
Melt the butter or margarine in a bowl in the microwave. Then add the crushed crackers to the butter. At this point you could also add the optional ingredients of crushed walnuts and white wine. If adding either ingredient it is all a matter of taste, I usually use a 1/4 cup of each. Then mix all ingredients together.
Next, spoon your mixture over the shrimp. Then sprinkle some garlic powder over the top of the mixture. I usually sprinkle about 1/2 teaspoon, again it is all personal taste.
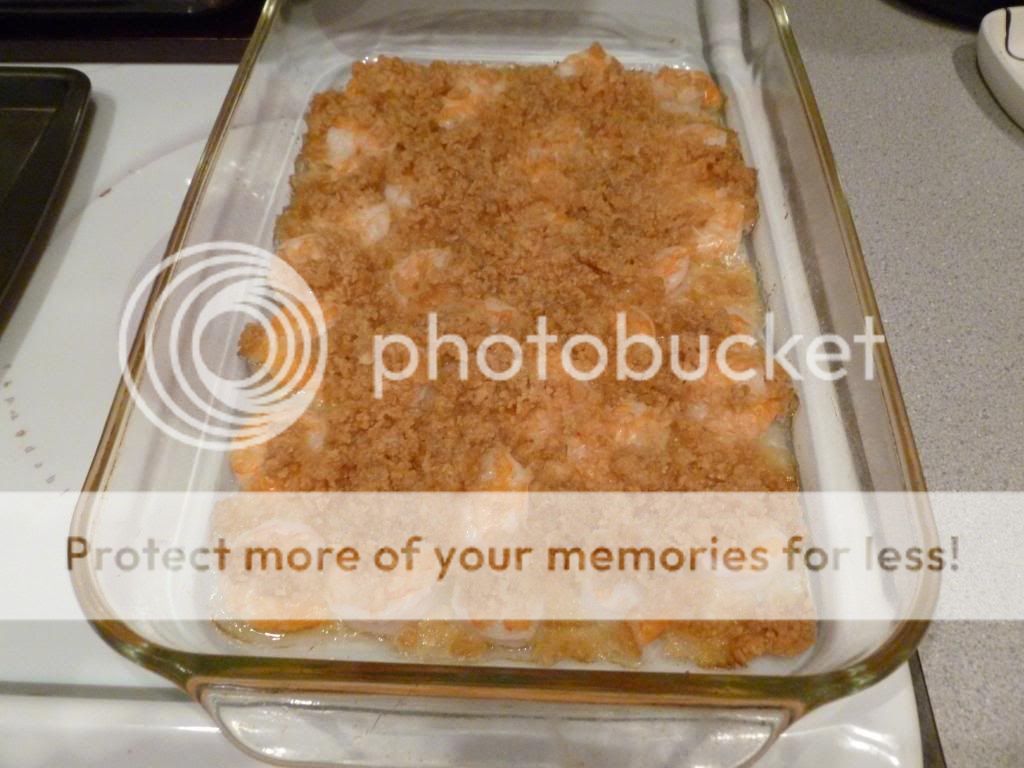
Bake uncovered in the preheated oven for 20-30 minutes until topping is golden brown and shrimp are pink. We usually have it with a salad, rice pilaf, and a glass of wine of course! Enjoy!!!
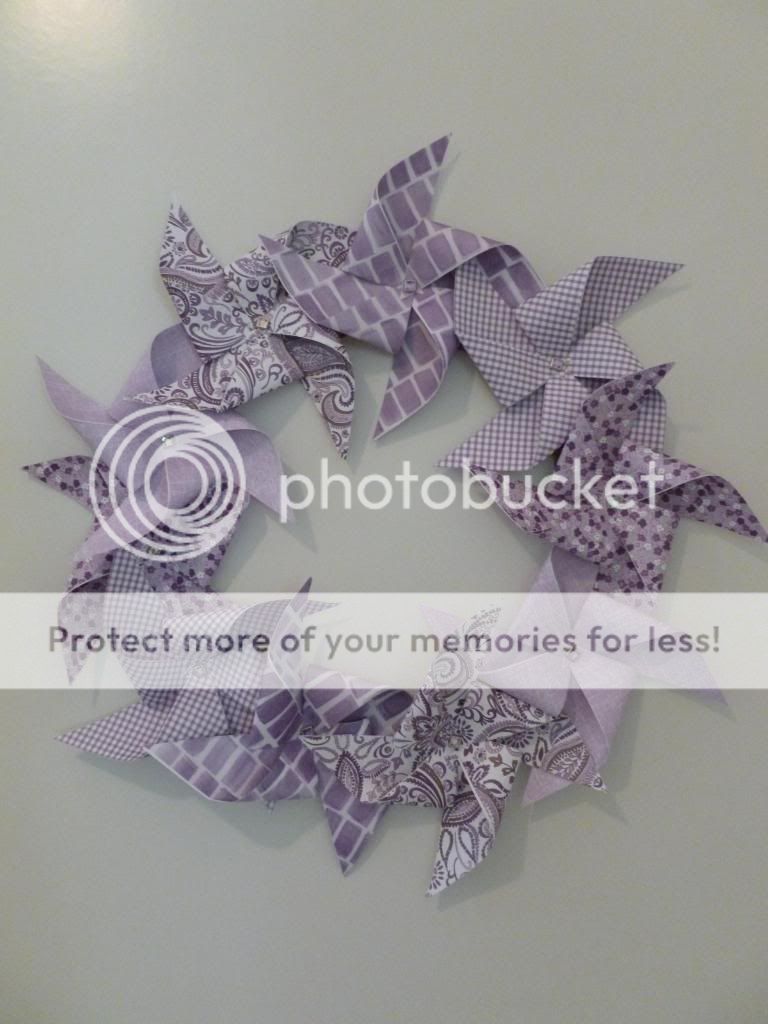
My bedroom door has had a silver tissue paper wreath on it since Christmas. I finally decided it was time to change it. Here is how to make a pinwheel wreath. I chose purple hues, but you could do this technique for any holiday or décor!
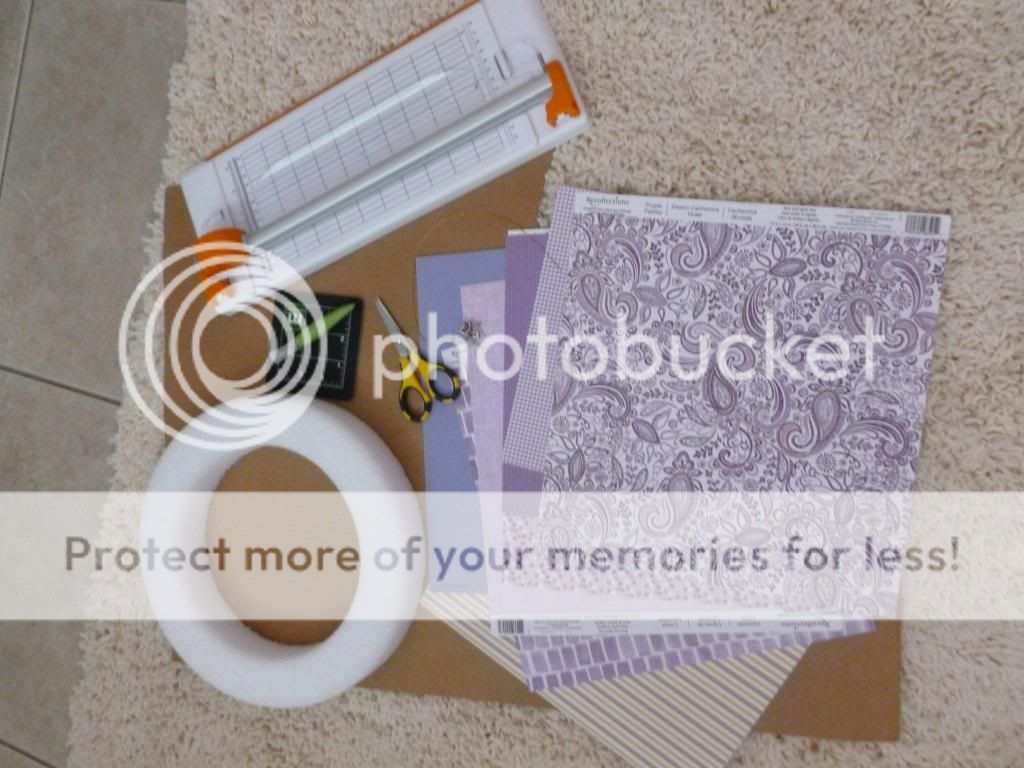
Supplies Needed:
Cardboard
Wreath or Circle Shape for Tracing
12 sheets of scrapbook paper (6 if double sided)
Paper Cutter
Double Sided Tape
Awl ( or thumbtack)
Brads
Scissors
Piece of String or Ribbon
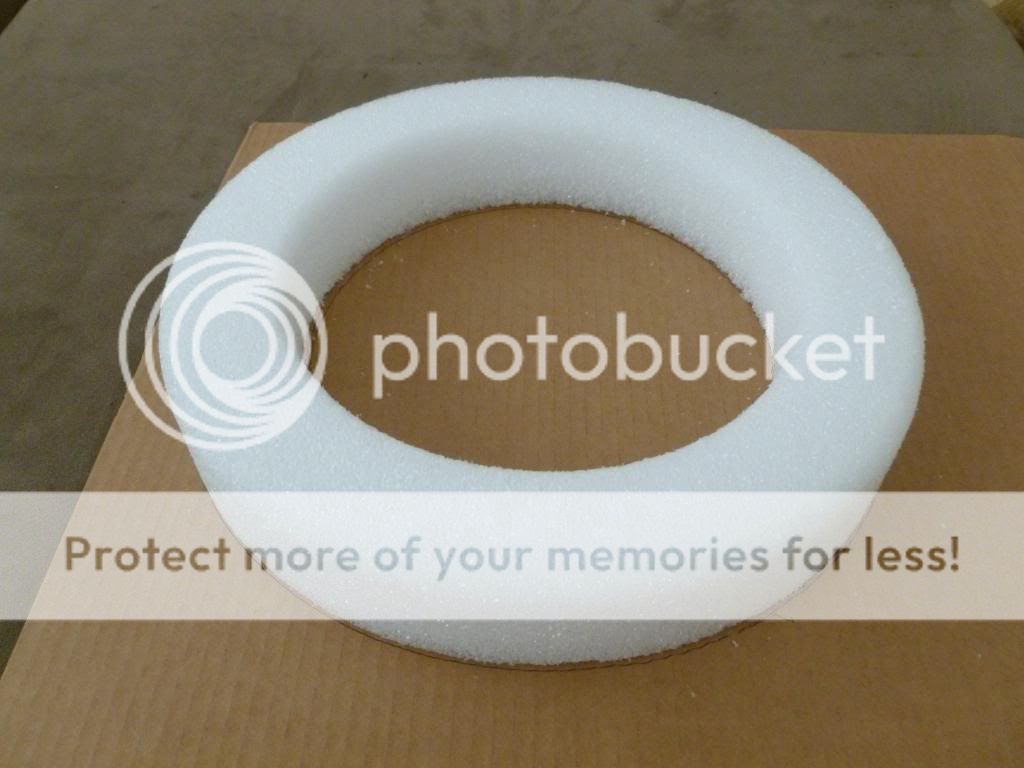
First, take your wreath or circle shapes and trace onto your cardboard piece. I used a 12" wreath form and traced the inner and outer rings.
Once you have traced the rings cut out the circles leaving you with a wreath form out of cardboard.
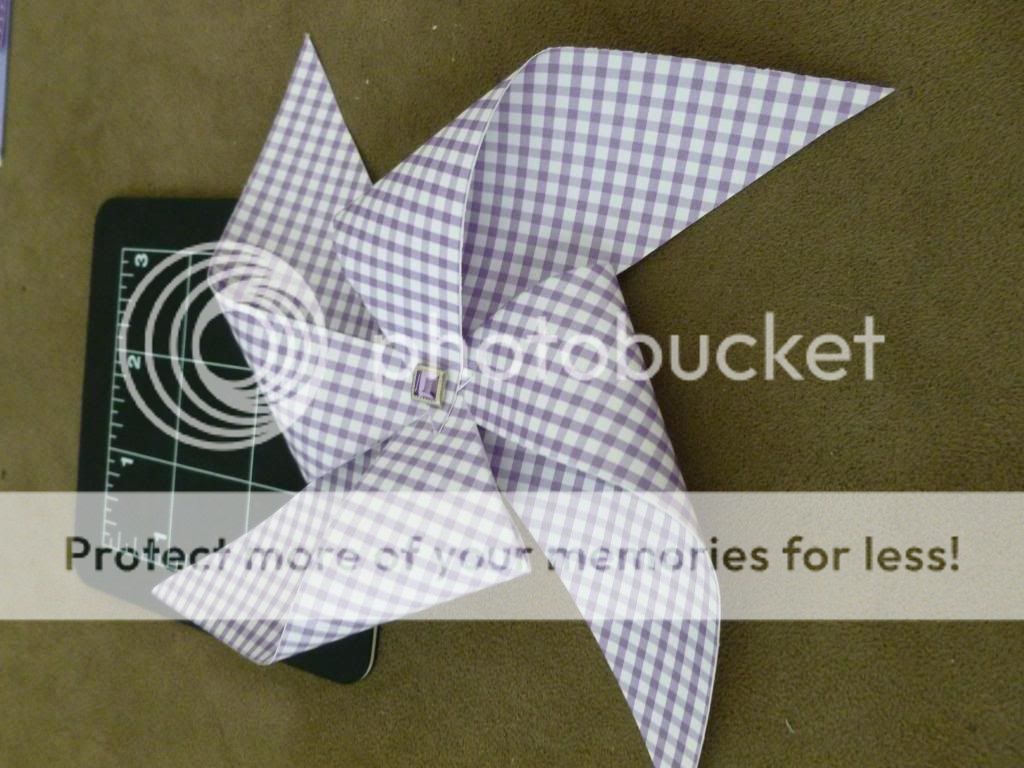
Next I selected colors and patterns from my scrapbook paper supplies. Usually I use double sided paper but didn't have any that I wanted to use. In this case, you can take single sided sheets and tape them together to make patterns on both sides. I do this so once the pinwheel is formed there is no white paper showing. Then, take your sheets and cut out 12 squares measuring 5 inches by 5 inches.
Once you have your squares cut, fold them into triangles one way and then unfold and fold into a triangle the other way. This leaves a scored square that looks like the below picture.
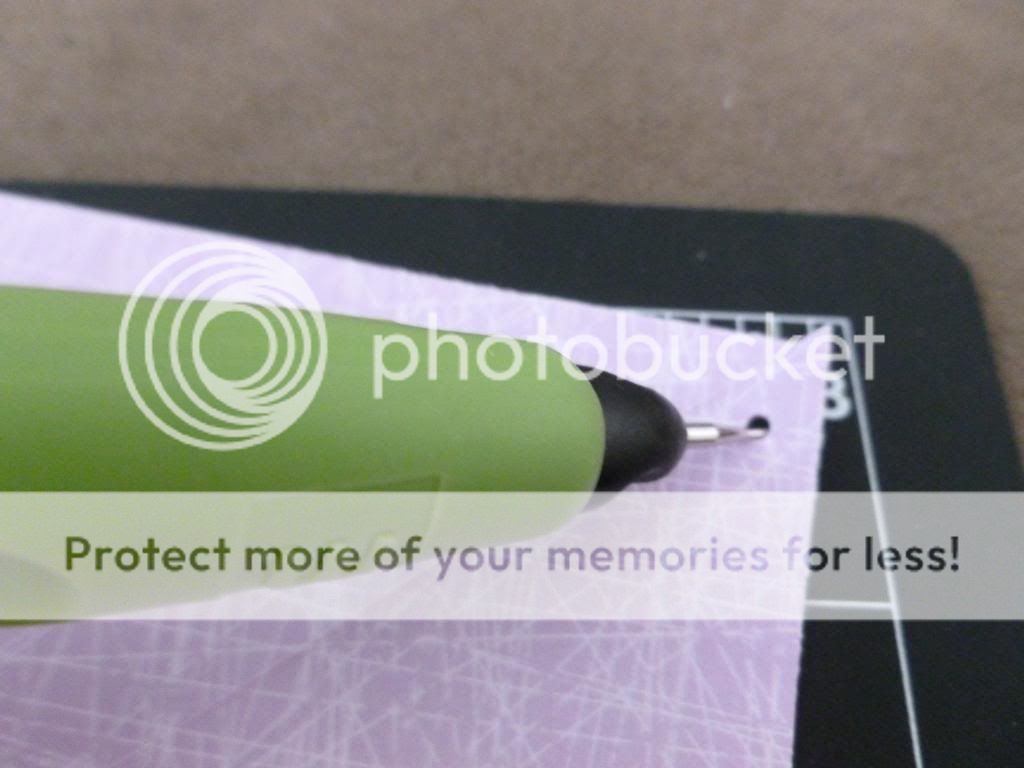
Then use scissors to cut along the score lines about 3/4 of the way to the center. If you cut too far, the pinwheels will fall apart. Use an awl (or thumbtack) and make holes in the alternating corners of the cut triangles.
Next, make a hole in the center of the square.
Take the alternating corners and fold them up towards the center and secure them together with a brad.
Repeat until you have between 10 and 12 pinwheels.
Next, arrange them on the cardboard to figure out fit and pattern. I like to overlap them to fill in any bare cardboard. You can always paint the cardboard or cover with ribbon if the pinwheels don't cover the cardboard to your liking.
Once you know where you would like each pinwheel placed, poke a hole into the cardboard and then secure it with the existing brad, or if your cardboard is too thick you could stick them on with glue dots. Next, I tied a piece of gold ribbon around the cardboard to make a hanger.
If you have a brown spot showing you can swivel the pinwheels to fill in the spaces. And you are done! Easy and very versatile!