The calendar says it is Fall but here in Orlando it is still 90 degrees! I did break out the fall decorations the other day and realized I had a whole bag of pinecones and wasn't sure what to do with them. Here is what I came up with:
This craft is super easy, quick, and free! All you need is pinecones, ribbon, and a glue gun. First I cut a bunch of ribbon and then tied one end around the tips of the pinecones. Next, take and put a dab of glue on the tip to hold the ribbon securely onto the pinecones. Then I took a smaller piece of ribbon and tied a bow around where I put the hot glue. That is all there is to it! I hung them on the inside of my front door with a command hook. Perfect for the fall!
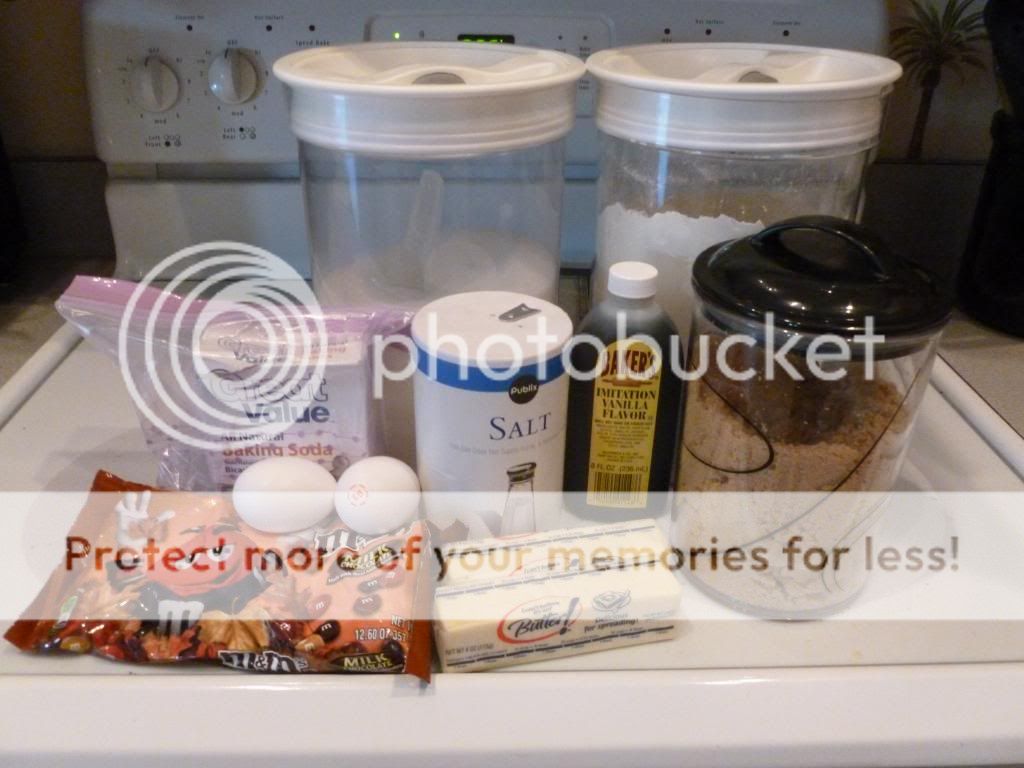
My boys have inherited my sweet tooth and love M & M's. They asked me to make them some cookies over the weekend and I had a bag of Fall Harvest colored M & M 's so I decided to whip up these M & M cookie bars. I love these because they are quick and easy, which is needed right now with a newborn!
Ingredients Needed:
Ingredients for your favorite chocolate chip cookie recipe
1 bag of M & M 's
First, prepare your dough according to your favorite chocolate chip cookie recipe up to the point of adding the chips. I used the Nestle Toll House recipe.
Once the dough is made stir in the bag of M & M's.
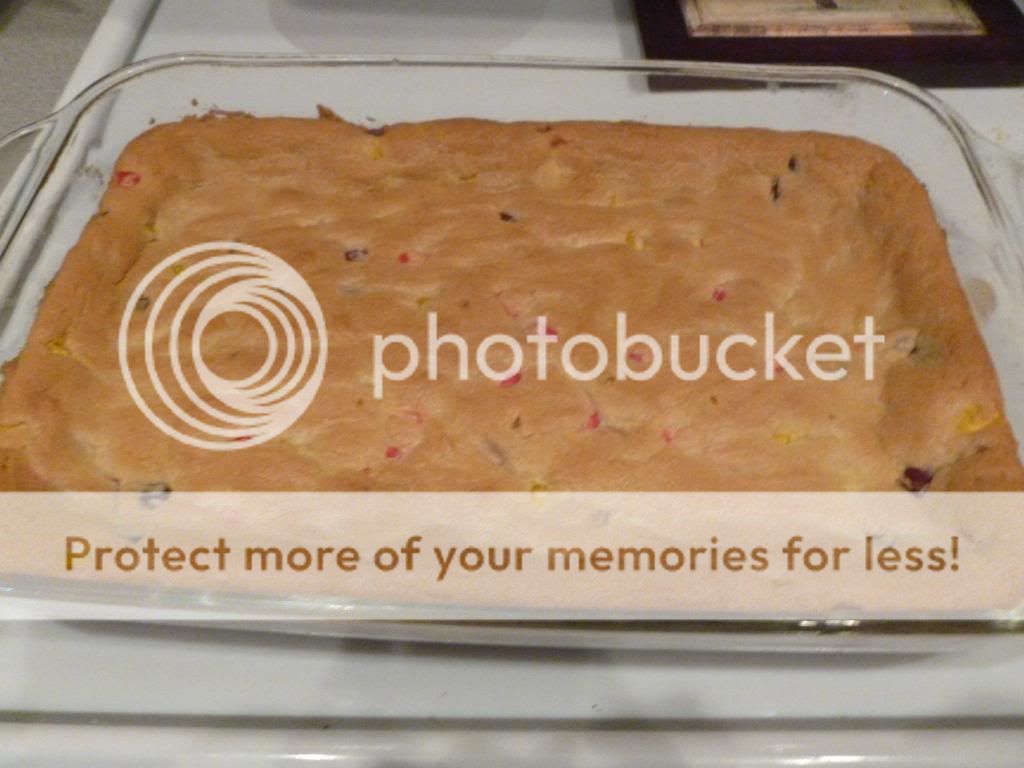
At this point you could make the dough into cookies but since I have a newborn and little time I decided to spread the dough in a 13 x 9 pan.
Next, cook in preheated 350 degree oven for about 20 minutes until golden brown and a toothpick inserted into the center comes out clean. Cool completely, cut, and enjoy the yummy M & M cookie bars!
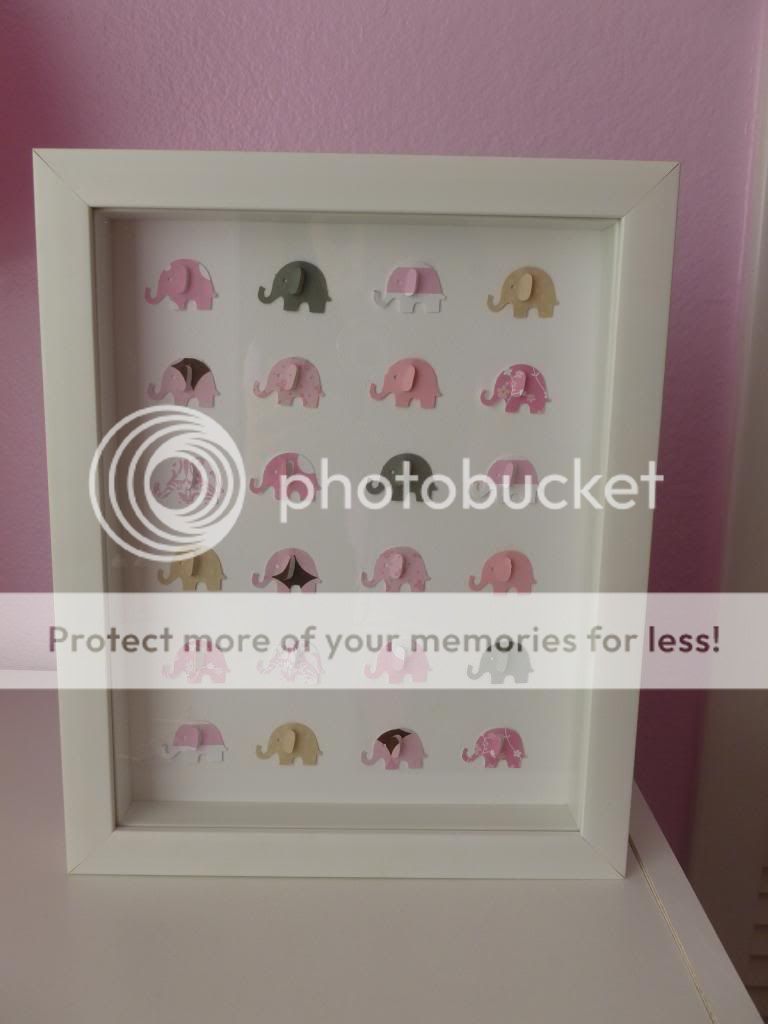
Today's Crafty Friday is an easy way to add custom artwork to your child's room. My little girl's room has a theme of pink elephants. I wanted something different and came up with this specimen art. I have made similar pieces for my Etsy shop and my own house for the holidays.
Supplies Needed:
8x10 shadow box (purchased at 40% off at local craft store)
elephant punch
scrapbook paper
white scrapbook paper for background
pop dots/dimensionals/glue dots
paper cutter
First, I used my elephant punch to make a bunch of elephants out of coordinating scrapbook papers. I ended up using 24 punched elephants for the project. You could use less if wanted.
This project is great because you could use any punch or cut shapes out on your cutting machine to coordinate with your room.
Next, trim a piece of white scrapbook paper to 8x10 to be the background to attach the elephants too.
Then I laid the background paper in the frame. I did this so I had an idea of where the edges were so I didn't place my elephants too close to the edge.
Then place the elephants in the desired pattern and adhere with a glue dot or pop dot for a 3d effect.
Finally, add the rest of the frame and hang! Easy, quick, and you can change it up to coordinate with any themed room or holiday!