I have this wall in my entryway that someday, in my spare time, I plan on putting family photos up on. But for now it is blank and empty.

At Christmas time I hung a red ribbon with command strips and hung my Christmas cards there. So, then I decided for the different holidays and seasons I would hang banners from it.
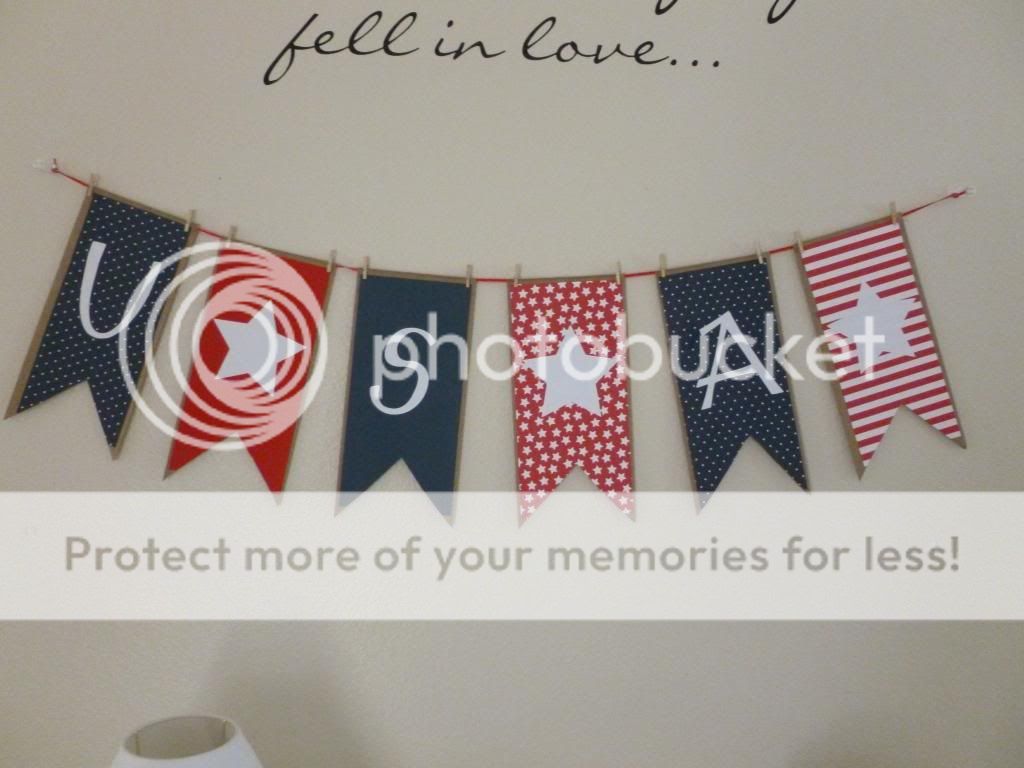
Today I am going to show you how I made one for the 4th of July.
Materials Needed:
6 paper lunch sacks Mini Clothespins
Coordinating scrapbook paper Ruler
Paper Trimmer Scissors
Double Stick Tape

First, I measured the paper bags and trimmed my base scrapbook papers to between an 1/8 " and 1/4" shorter than the paper bags on all edges. Then, I adhered the trimmed scrapbook paper to the paper lunch bags with double stick tape.

Next, I eyeballed where I wanted to make a V shape at the bottom of the paper lunch bag through both the bag and paper and made my cuts. You could measure it and then cut it, but I was being lazy.

Next, I used my Silhouette to cut the letters U, S and A and some stars out of white scrapbook paper. You could also use a stencil or free hand it. Then, with the double stick tape I adhered them to the bags.

Finally, I took mini clothespins and hung them on the ribbon.
Festive, quick, and easy!
Thanks for joining me today and check back for more of my 4th of July decorations!
No comments:
Post a Comment